

[ad_1]
Questioning the right way to arrange RetroPie NES to play your favourite Nintendo video games in your tv? Fortunate for you, we’re going to point out you the right way to simply get your Raspberry Pi arrange for utilizing RetroPie and lr-fceumm for enjoying some enjoyable retro video games on the massive display screen while not having the unique Nintendo Leisure System console.
After you end this information, make sure you try our different information for the right way to arrange the RetroArch NES Core Mesen.
How To Setup RetroPie for NES?
What You’ll Want
- For those who don’t have one but, you’ll want your personal Raspberry Pi machine – you’ll clearly want one with a view to end this tutorial and you may seize a Raspberry Pi 4 right here off of Amazon for round $100
- Additionally, go forward and obtain RetroPie from the official web site right here
- For those who plan to obtain the required information and ROMs in your Raspberry Pi, you’ll additionally want a keyboard and mouse to make use of with it
- Don’t overlook to get your NES ROMs able to play video games (remember the fact that the lr-fceumm emulator accepts the next file extensions: .7z, .fds, .nes, and .zip)
- You’ll additionally must have a controller and we advocate you go together with the 8Bitdo SN30 Professional
- If at any time you’d prefer to seek the advice of the official RetroPie docs, you are able to do so on their web site right here.
1. Setup Your Raspberry Pi
Fortunately, the perfect NES emulator comes because the default emulator for RetroPie so there’s not a lot additional work you could do to put in it apart from downloading and putting in RetroPie itself.
For those who’re utilizing an older model of RetroPie that didn’t include lr-fceumm preinstalled, you possibly can simply get it by doing the next:
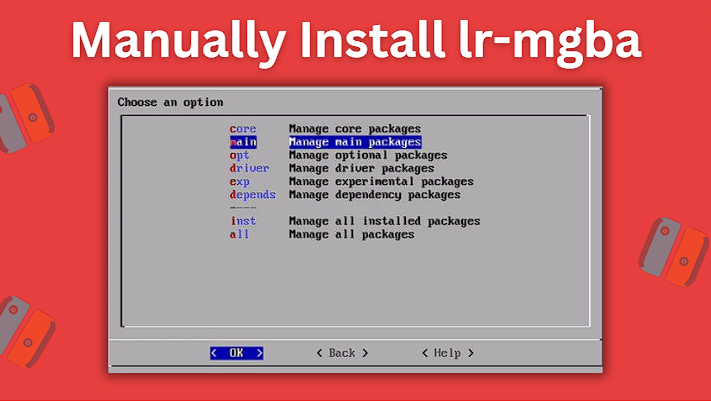
- In RetroPie settings, head to RetroPie Setup
- Subsequent, go to Handle packages > Handle foremost packages
- Go down after which select lr-fceumm
- After that, select Set up from pre-compiled binary
- Let RetroPie obtain the lr-fceumm emulator and as soon as it finishes, you possibly can return by the menu and select Exit
2. Put Your NES Roms Onto Your RetroPie
We’ll now be transferring our NES ROMs onto RetroPie.
Transfer ROM Information Utilizing Your Raspberry Pi
You’ll must have the Pixel desktop surroundings software put in in your Raspberry Pi to have the ability to entry desktop mode on it. We’ll now be masking the right way to get this setup.
Head to the RetroPie choices menu after which go forward and go to RetroPie Setup > Configuration / Instruments > Raspbian Instruments > Set up Pixel desktop surroundings.
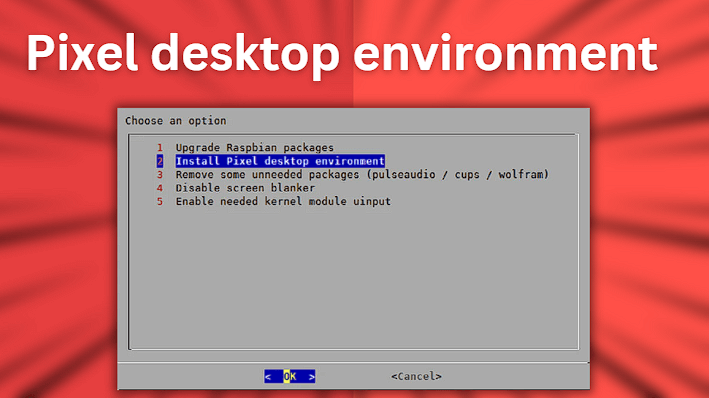
After you could have efficiently put in the Pixel desktop surroundings in your Raspberry Pi, go forward and restart the machine. After restarting, it’s best to now be capable of entry desktop mode by going to Ports > Desktop.
The desktop surroundings means that you can navigate the information in your Raspberry Pi equally to how you’d on a Home windows pc.
Now that we’ve put in the desktop surroundings, we’ll want to maneuver our NES ROM(s) to the correct folder on our Raspberry Pi:
- /dwelling/pi/RetroPie/roms/nes/
Distant Entry Your Raspberry Pi From Your PC
The best approach to get information out of your PC pc to your Raspberry Pi is by remotely accessing the Pi out of your PC. To do that, you’ll first need to guarantee that your Raspberry Pi is linked to the identical community as your PC.
First, make certain your Pi is linked to your WiFi or to your community router instantly utilizing an ethernet cable.
Open up the Home windows file explorer in your PC and kind retropie into the tackle bar on the prime. After ready for a couple of minutes, your Raspberry Pi ought to seem. If it doesn’t seem, there are a number of further steps we’ll must take. If yours does seem, you possibly can go forward and skip to instantly beneath the Distant Entry screenshot proven down beneath.
In your Raspberry Pi, open the terminal window and kind in:
- sudo apt-get set up xrdp
This command will now start to put in the distant desktop server.
Now you’ll want to determine the IP tackle of your Raspberry Pi. To do that kind, you’ll need to use the next command:
Make an observation of your Raspberry Pi’s IP tackle as a result of we might want to use this quickly with a view to hook up with it remotely. You’ll additionally want your Pi’s username and password.
Now in your PC, go forward and open the distant desktop app by typing distant desktop into the Home windows search bar within the backside left. Click on distant desktop connection to make use of the distant desktop app.
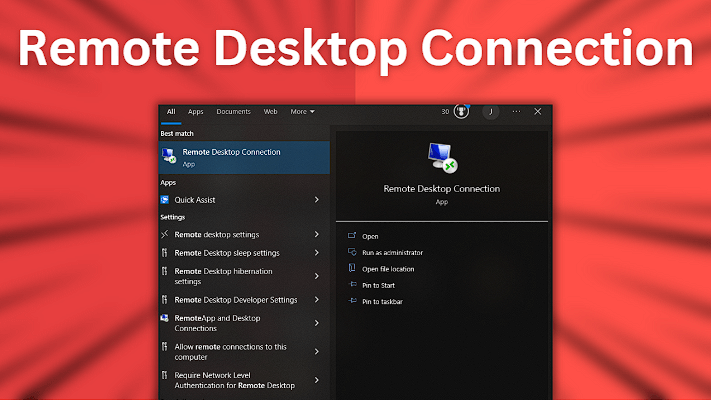
Seek for and choose Distant Desktop Connection in your PC
Within the Distant Desktop Connection window that pops up, you’ll now need to enter the IP tackle of your Raspberry Pi that you just obtained earlier. After clicking join, login utilizing your Raspberry Pi’s username and password.
If all the pieces went appropriately, it’s best to now be capable of remotely entry your Raspberry Pi out of your PC. To double-check that you’ll be able to entry your Raspberry Pi remotely, open up Home windows File Explorer and kind retropie into the tackle bar. You need to see your Retropie information seem.
Whether or not your Raspberry Pi appeared routinely otherwise you wanted to do the extra steps, now we’re transferring on to the ultimate elements.
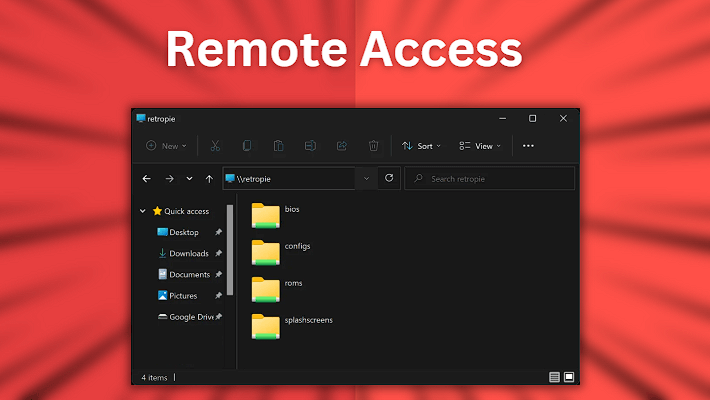
Bear in mind earlier, we talked about that we would wish to repeat our NES ROMs from our PC to this listing on our Raspberry Pi:
Navigate to roms > nes and duplicate your NES ROMs information out of your PC to this folder in your Raspberry Pi. After you’ve copied your ROMs over, restart your Raspberry Pi and the video games ought to now seem as anticipated.
3. Play Your NES Video games
Now that your Raspberry Pi has been restarted and is all arrange and able to go, you possibly can boot up EmulationStation and when you spotlight Recreation Boy Advance, it ought to present you on the backside what number of video games can be found to be performed for it. You’re now all able to play!
This text might include affiliate hyperlinks. For those who use these hyperlinks to buy an merchandise, we might earn a fee. Thanks to your assist.
[ad_2]
Source link
